Step 5: Connect the Broadcaster (Broadcaster UI)
Note: If you have already fully registered your Broadcaster in ZEN Master, you can skip this step and proceed to the next one.
After saving the Broadcaster in ZEN Master, its status will show as Pending. You now need to complete the connection from the Broadcaster UI by configuring the SSH tunnel back to ZEN Master. You will be working in both ZEN Master and the Broadcaster UI simultaneously, so it is helpful to keep both open in separate browser tabs.
In ZEN Master, in the main navigation, click Broadcasters and open the Broadcasters tab.
Click on the Broadcaster you set up in the previous step with Pending status to reveal its details.
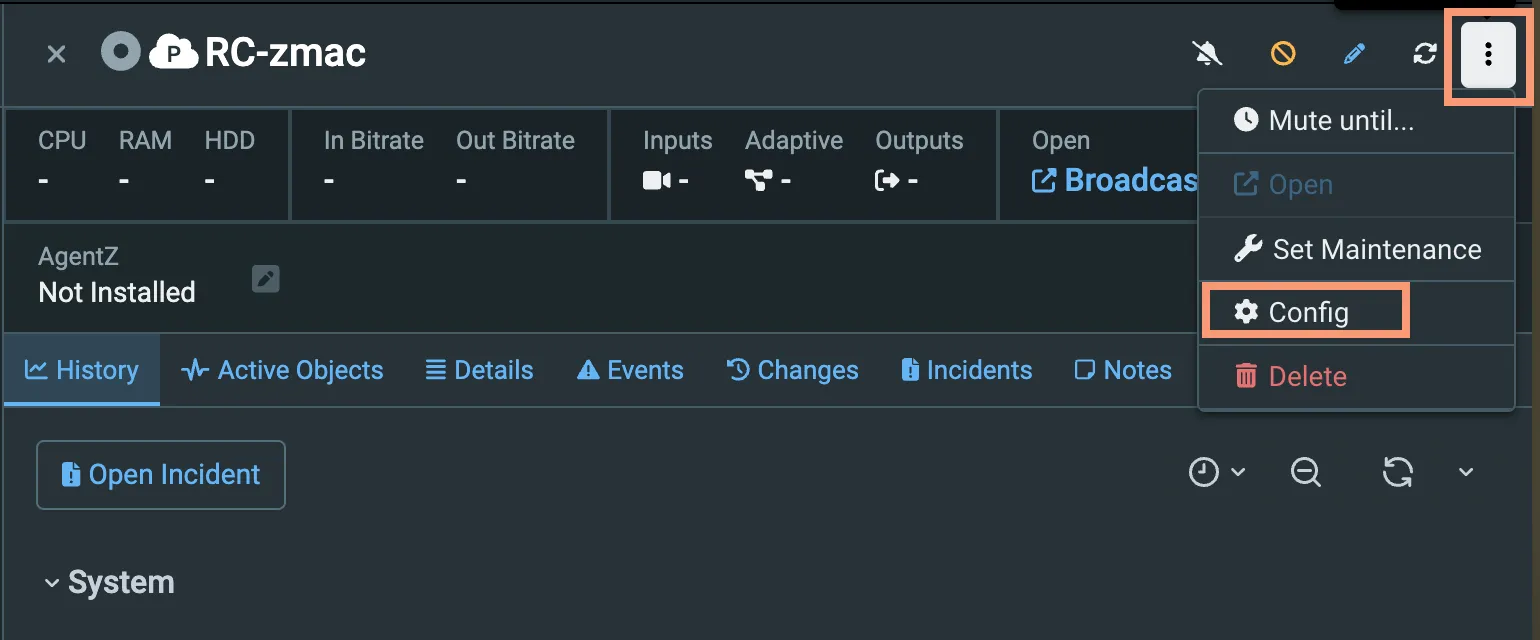
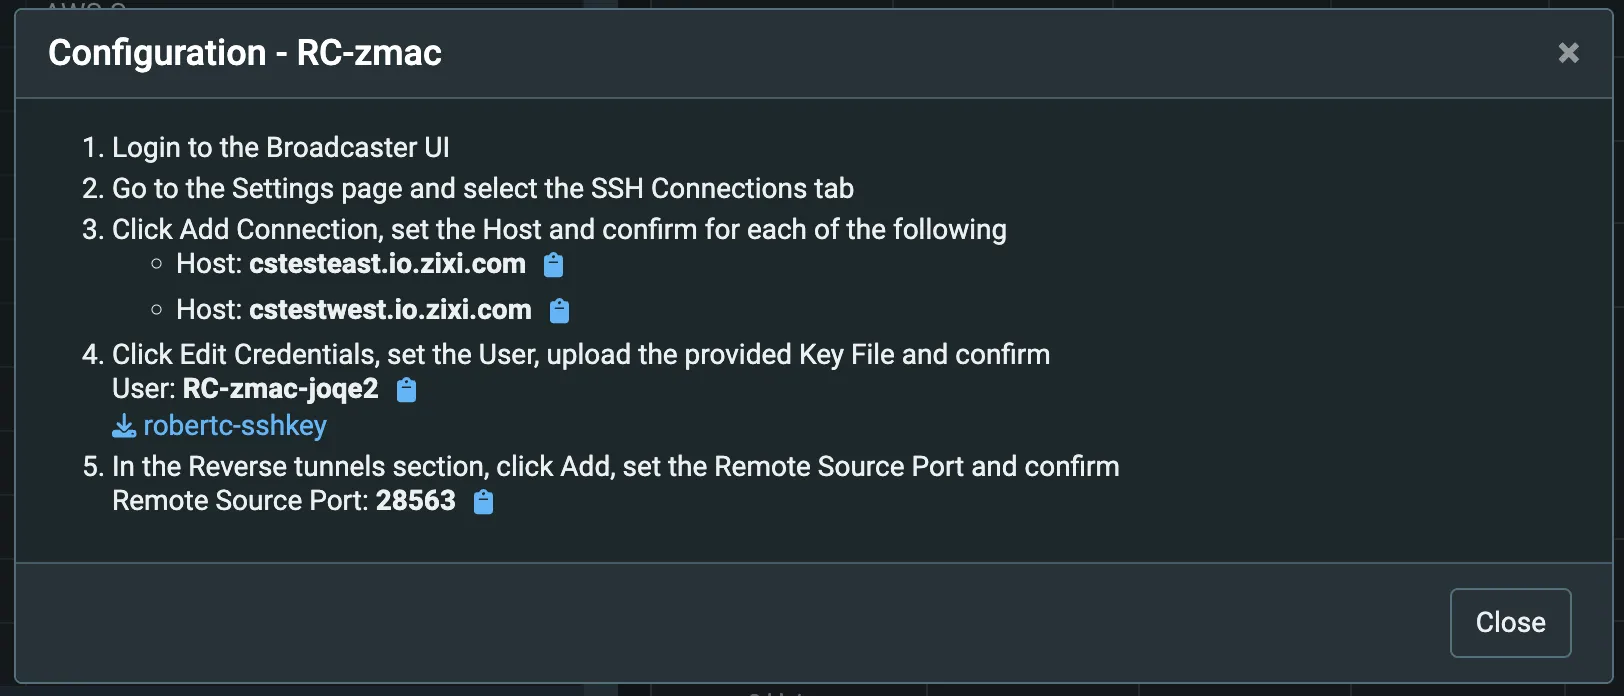
Click the ⋮ icon in the upper-right corner of the details panel and select Config. ZEN Master displays step-by-step configuration instructions for this Broadcaster — including values to copy and paste into the Broadcaster UI, and a button to download the SSH certificate you will need.
In a new browser tab, open the Broadcaster UI. If the Broadcaster is running locally, navigate to http://localhost:4444 or http://127.0.0.1:4444; if remote, navigate to http://<ip-address>:4444.
Log in as admin (default password: 1234 - if you changed the admin password, use the new value).
In the Broadcaster UI, go to Settings in the main navigation and click SSH Connections.
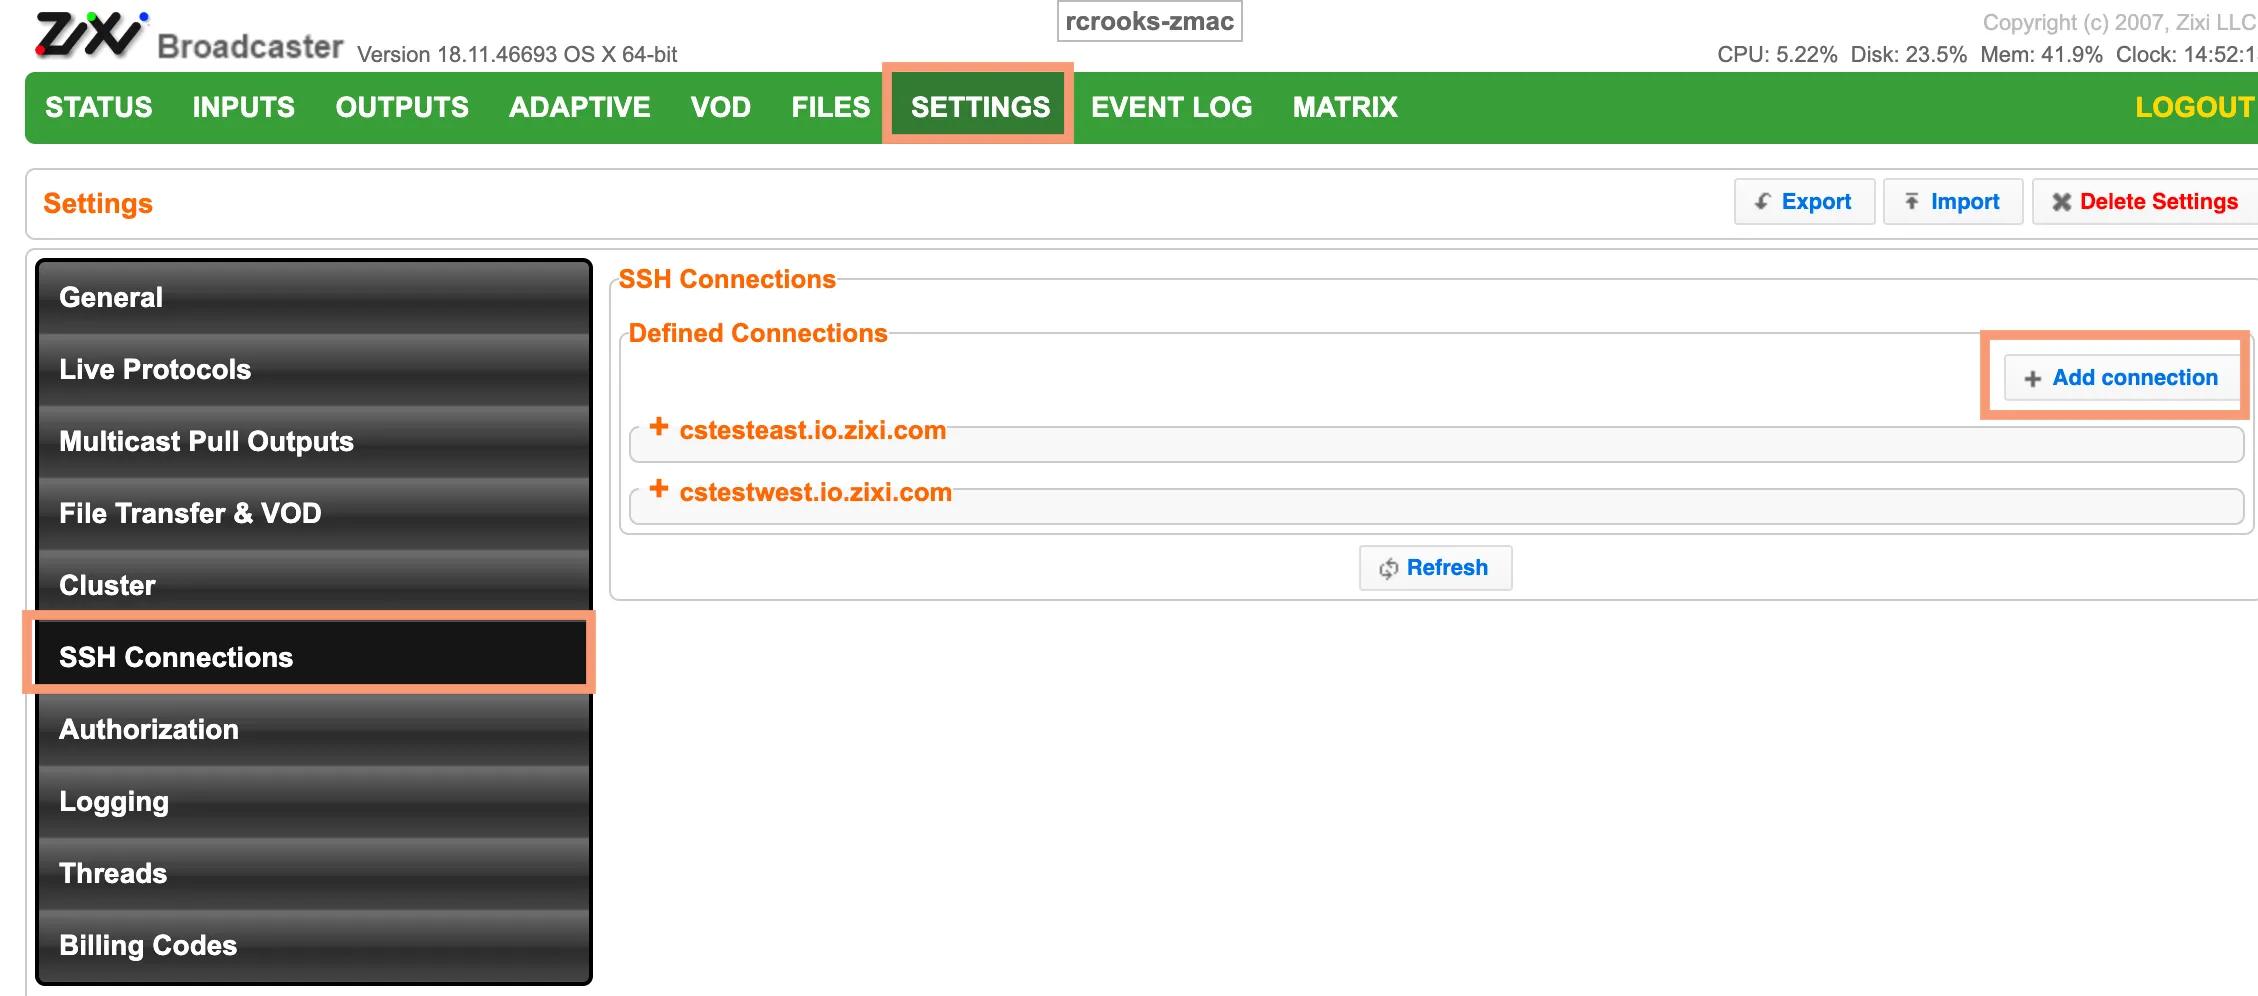
Click Add Connection and follow the instructions in the ZEN Master Configuration.
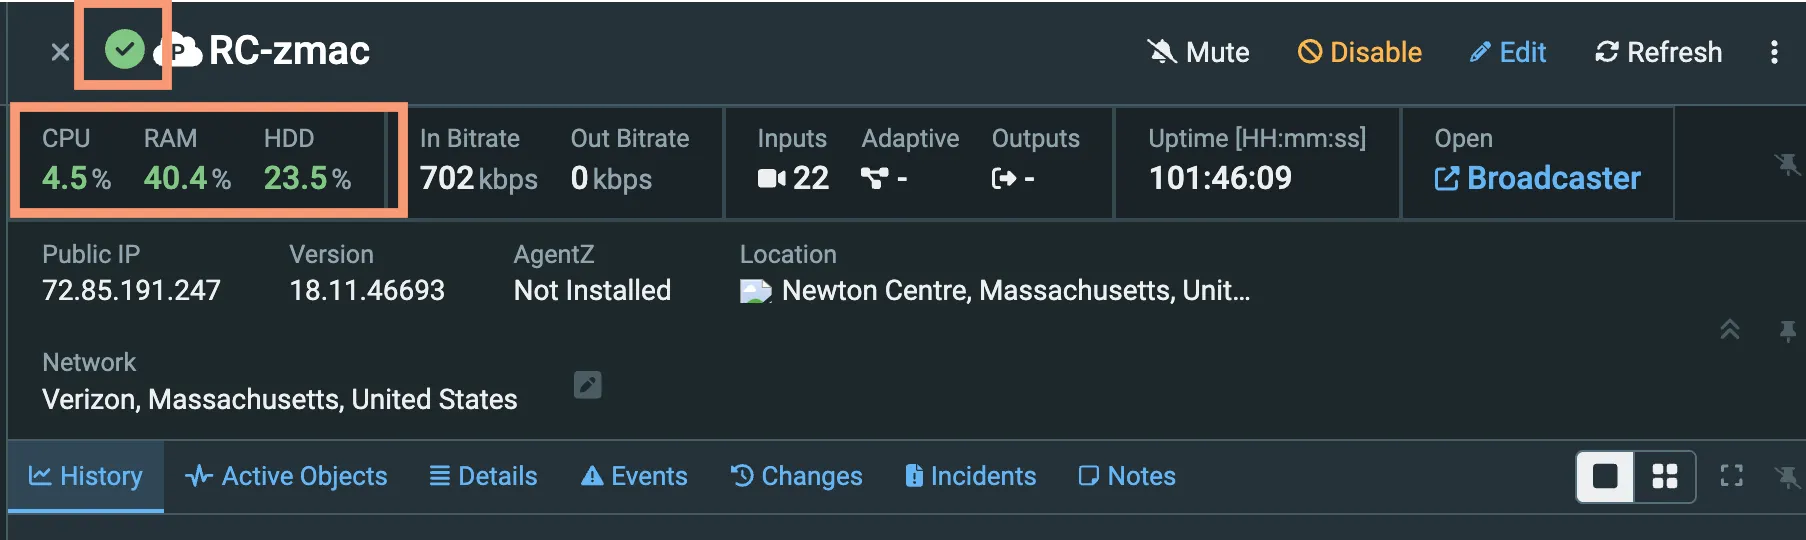
When you are finished, check the Broadcaster details in ZEN Master again, and you should see that the connection is established: