Viewing Live Events in Timeline View
The Timeline View provides a visual representation of Live Events across time, enabling users to easily understand the scheduling, duration, and progression of each event and its stages.
Unlike the Table View, which presents events as a structured list, the Timeline View displays events along a time axis. This allows users to quickly identify when events are scheduled, how long each stage lasts, and how multiple events overlap or interact within the same timeframe.
The Timeline View is especially useful for:
- Monitoring upcoming and ongoing Live Events
- Understanding the sequence and timing of event stages
- Identifying overlaps or gaps between events
- Managing scheduling adjustments in real time
Timeline View Elements
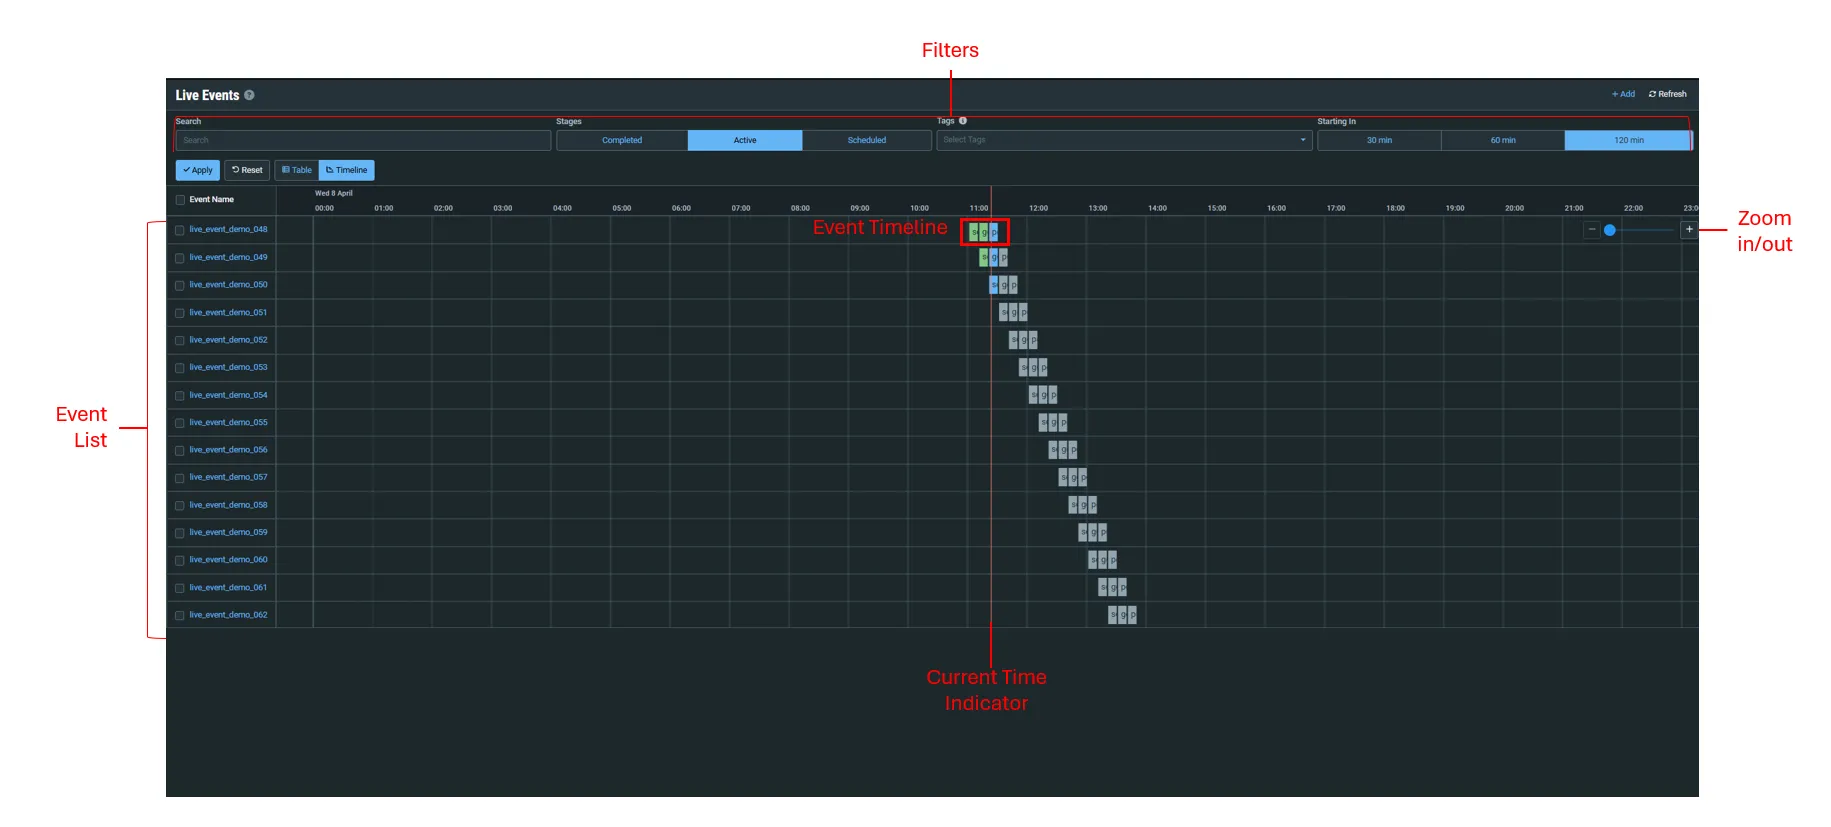
The Timeline View displays Live Events along a horizontal time axis, with each event represented as a row and its stages positioned according to their scheduled time.
Event List
Displays all configured Live Events. Each row represents a single Live Event. Events may include:
- Completed events (past)
- Active events (currently running)
- Scheduled events (future)
Time Axis
Displays the timeline across hours and days. Use SHIFT + Scroll to scroll the time axis.
This enables you to:
- View exact scheduling
- Understand event duration
- Identify overlaps between events
Event Stages
Stages are displayed as blocks within the event row. Each block represents a stage in the Live Event lifecycle (for example, pre-event, main event, post-event). Hovering over a stage displays additional details such as stage name, status, scheduled time, and duration.
The status of each event stage is indicated by the following colors:

Current Time Indicator
A vertical line indicates the current time within the timeline.
This helps you quickly identify:
- Which events are currently active
- Where you are relative to scheduled events
Zoom Control
Located on the right side of the timeline. Use CTRL + Scroll to zoom in/out.
Use the slider and +/- controls to zoom in or out:
- Zoom in for detailed time resolution
- Zoom out for a broader overview
Filters
The screen displays a filter at the top - see Using the Live Events Filter
Navigating to an Event
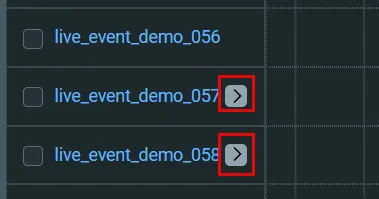
The arrow button next to each event name centers the timeline on that specific event. This allows you to quickly locate the event within the timeline when working with large time ranges or many events.
- Arrows pointing to the left - indicate events in the past.
- Arrows pointing to the right - indicate future events.
Deleting Events
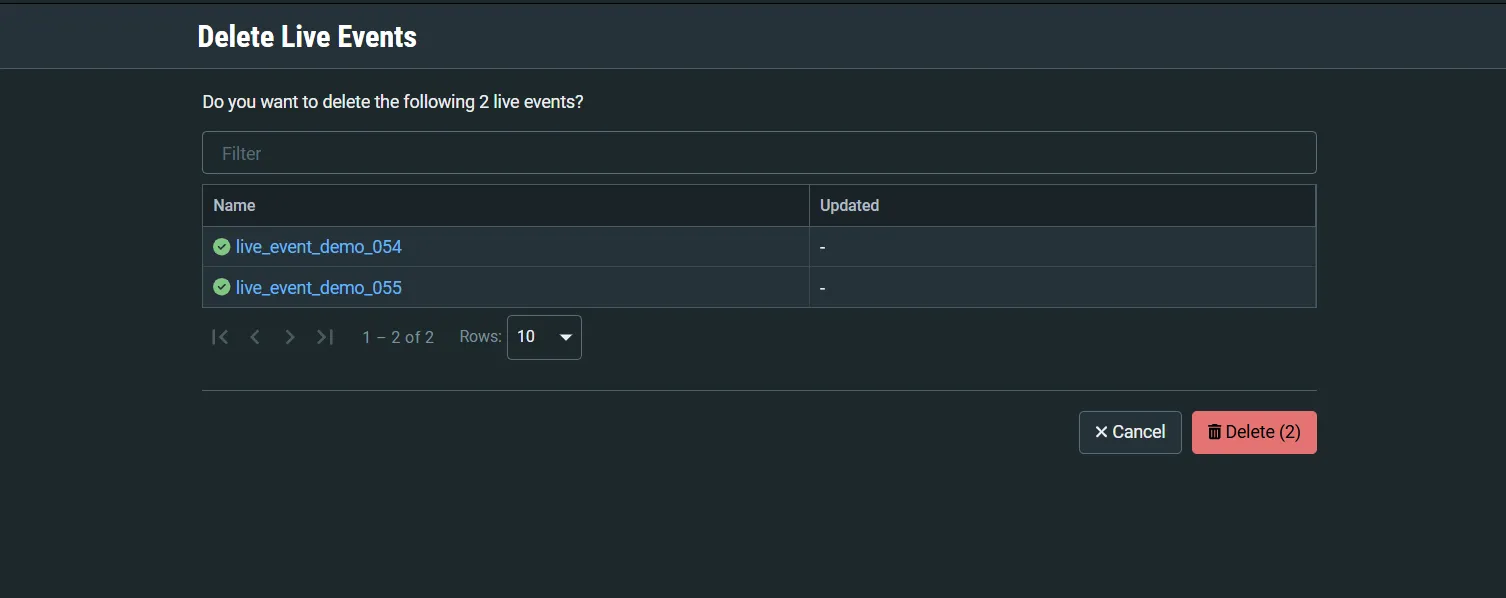
You can select one or more Live Events using the checkboxes next to each event and delete the selected events.
To delete events:
- Select one or more events.
- Click Delete.

- Confirm the deletion of the events.
Using Event Manual Controls
You can select one or more Live Events using the checkboxes next to each event and and use its manual controls. To learn more - see Live Event Manual Controls
