Adding an RTP-FEC-protocol MediaConnect Source
To create an RTP-FEC MediaConnect Source:
In the main navigation, click Sources.
Click + Add Source.
The Create New Source window is displayed.
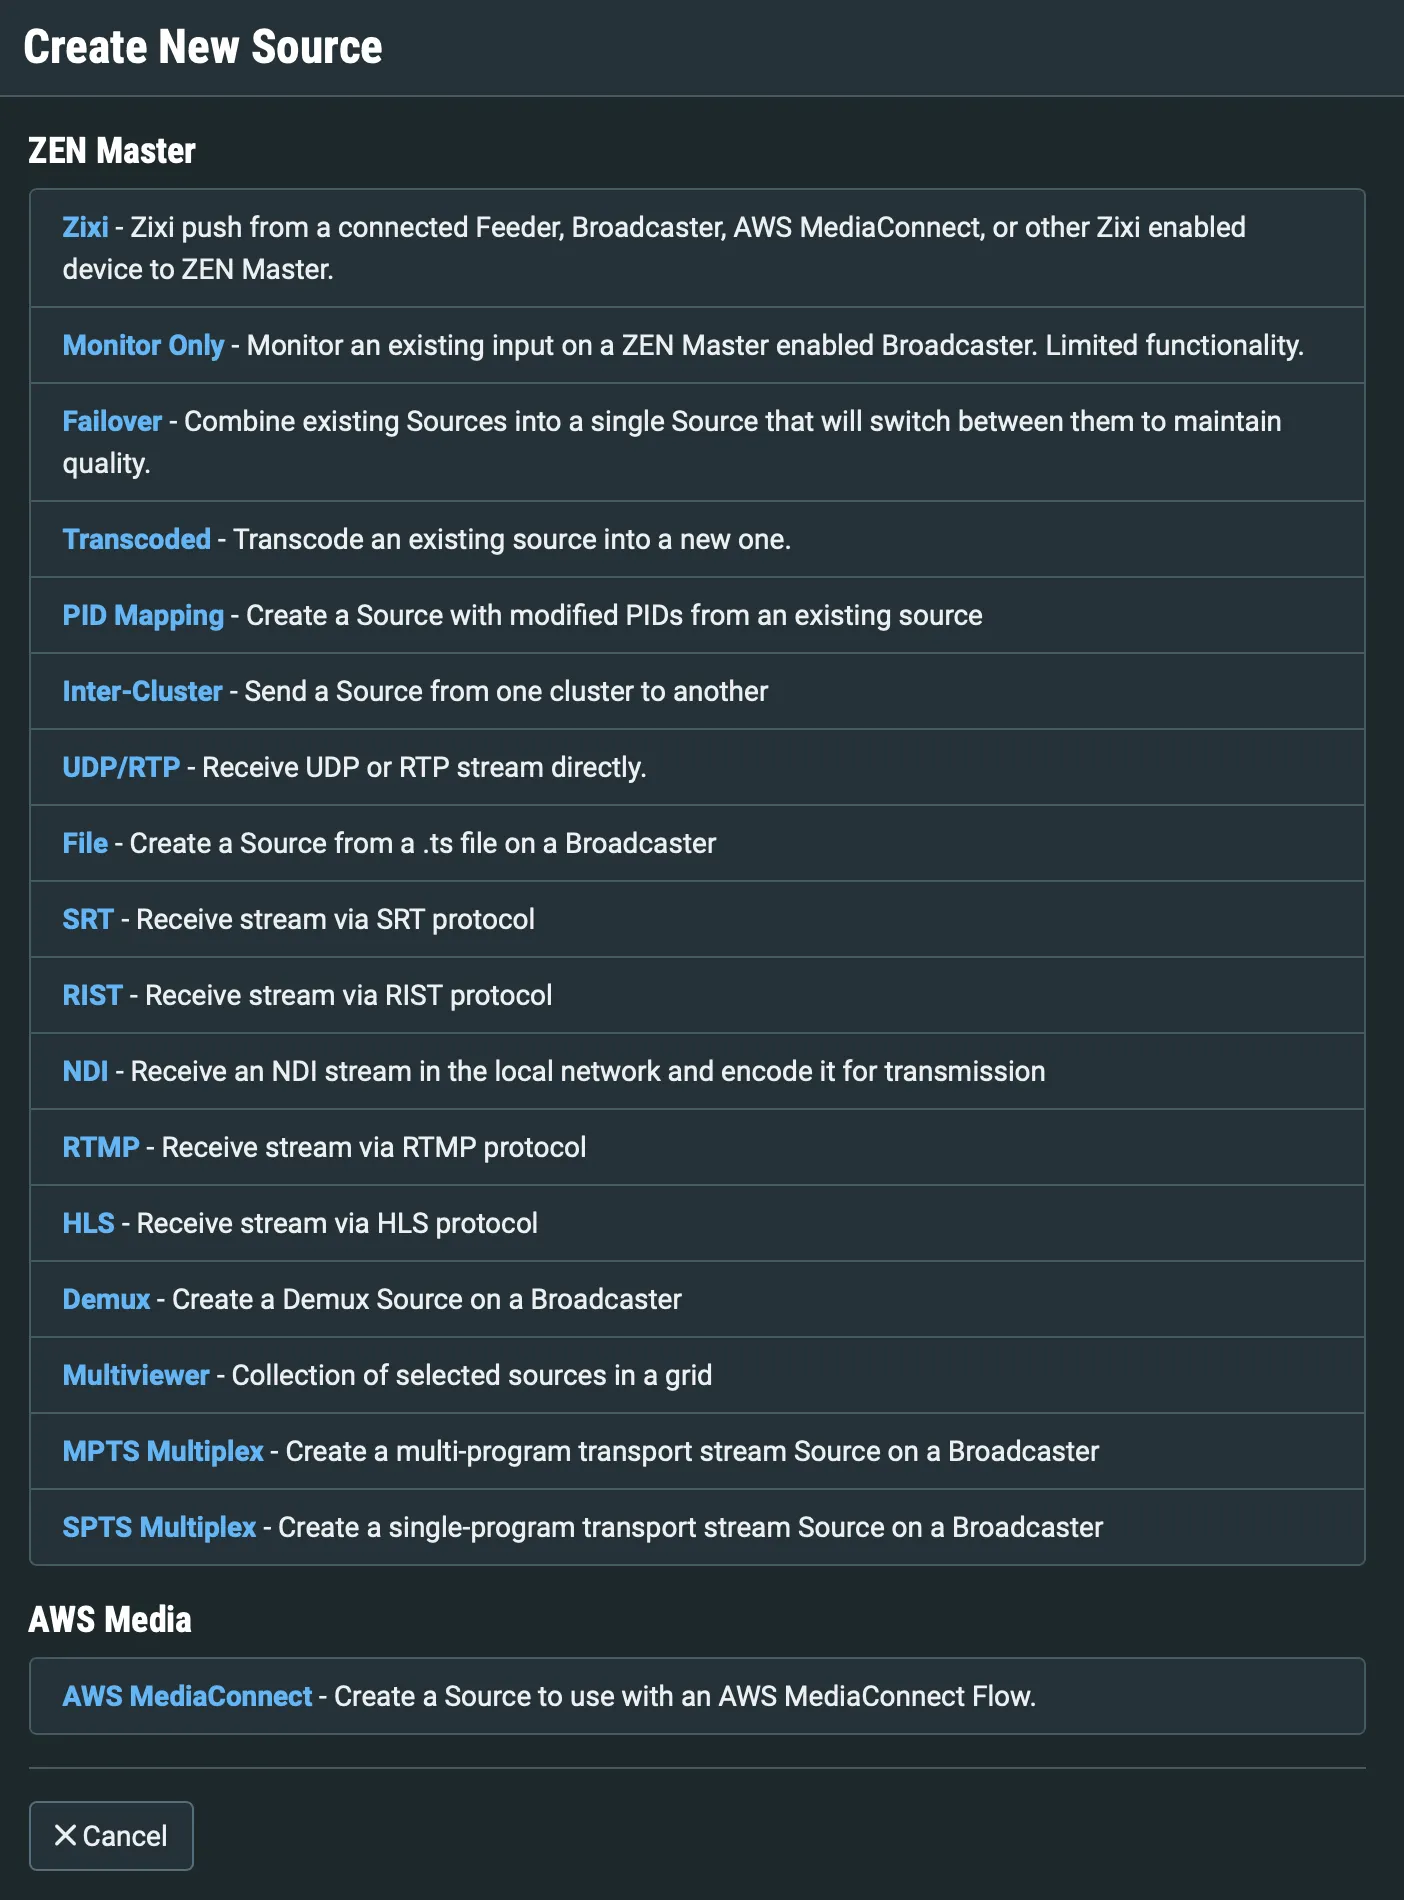
Under AWS Media, click on AWS MediaConnect.
The Create New AWS Media Source window opens.
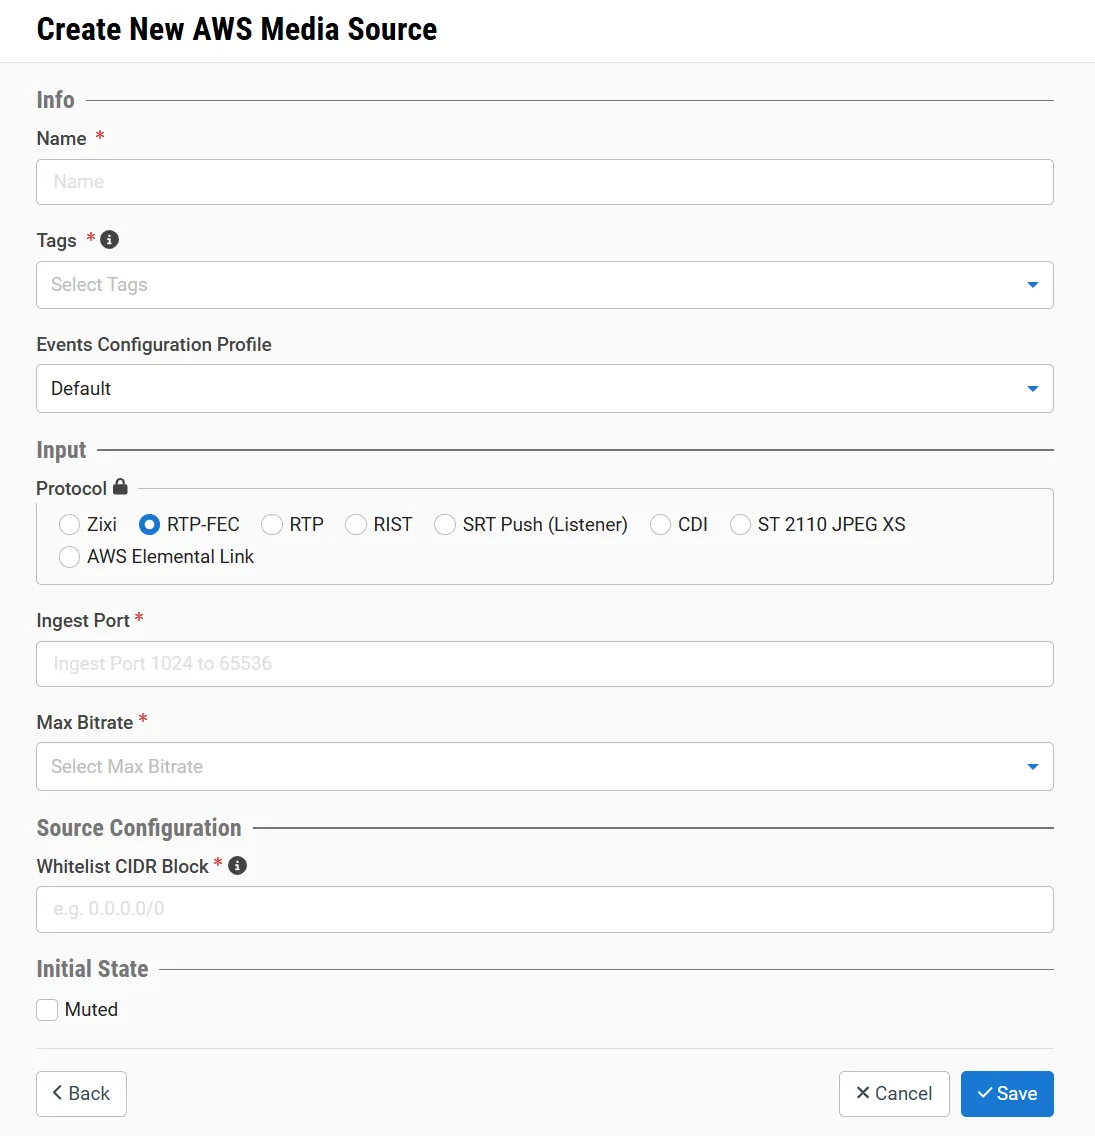
In the Info section, in the Name field, type a logical name for the Source.
In the Tags field, select one or more of the predefined Tags from the drop-down list. Tags are used for access control. By selecting a Tag, you are relating this Source to that Tag. Tags are associated with certain roles (through the Users & Roles screen), and roles, in turn, are associated with users and user groups. If you would like to create a new Tag, see Creating a Tag.
In the Events Configuration Profile field, select from the drop-down list the profile that you would like to apply to this Source. By default, the Default profile is applied. Events Profiles consist of a series of rules that determine precisely how various types of Events are logged and what results they trigger.
In the Input section, under Protocol, select the RTP-FEC radio button.
In the Ingest Port field, enter the port that the Flow will listen on for incoming content.
In the Max Bitrate field, select from the drop-down list the maximum bitrate for this Source.
You are required by MediaConnect to enter a valid Whitelist CIDR block. The whitelist CIDR block is a range of IP addresses that should be allowed to contribute content to your source. These IP addresses must be in the form of a Classless Inter-Domain Routing block. For example, 10.0.0.0/16. The source needs to be in the range covered by this CIDR block. Any IP address within this range is allowed to send content to this flow.
In the Initial State section, select the Muted checkbox if you would like to disable error/recovery notifications for this Source upon initial configuration. You can Unmute the Source at any time.
Click Save.
Parameters Table
Parameter | Description |
|---|---|
Info | |
Name | Specify a name for the AWS Media Source in ZEN Master. |
Tags | Select one or more of the predefined Tags from the drop-down list. Tags are used for access control. By selecting a Tag, you are relating this Source to that Tag. Tags are associated with certain roles (through the Users & Roles screen), and roles, in turn, are associated with users and user groups. If you would like to create a new Tag, see Creating a Tag. |
Events Configuration Profile | Select from the drop-down list the profile that you would like to apply to this Source. By default, the Default profile is applied. Note: Events Profiles consist of a series of rules that determine precisely how various types of Events are logged and what results they trigger. |
Input | |
Protocol | To create an RTP-FEC Input AWS Media Source, select the RTP-FEC radio button. |
Ingest Port | Enter the port that the Flow will listen on for incoming content. |
Max Bitrate | Select from the drop-down list the maximum bitrate for this Source. Make sure that the value is greater than the max bitrate for the input. The default is set automatically based on the current bitrate of the input. |
Source Configuration | |
Whitelist CIDR Block | Specify the CIDR for the range of IPs that you would like to allow to contribute content to this Source. You are required by MediaConnect to enter a valid Whitelist CIDR block. |
Initial State | |
Muted | Select this checkbox if you would like to disable error/recovery notifications for this Source upon initial configuration. |